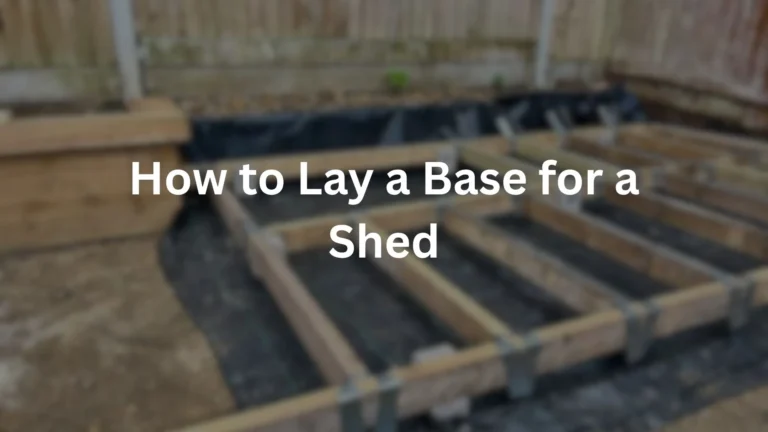

Whether you’re laying a base for a greenhouse, bin store, log store, or any other garden structure, getting the concrete mix and pouring technique right is what separates a strong, long lasting base from one that cracks, crumbles, or fails within a year or two. The good news is that with the right ratio, the right tools, and a bit of patience during curing, this is a genuinely achievable DIY project.
At JPD Landscaping & Building Services, we’ve mixed and poured concrete bases across South East London for over 15 years. This guide focuses specifically on the technique itself, covering the right mix ratio, the tools you’ll need, how to pour and finish the concrete properly, and how long it actually needs to cure before you can use it.
How to Lay a Concrete Base
For a general purpose concrete base, use a 1:2:4 ratio of cement, sand, and aggregate. Once poured and levelled, allow 3 to 4 days before light use, and a full 28 days to reach complete strength. Getting the water content right during mixing, properly compacting the sub base beforehand, and avoiding pouring in bad weather are the three factors that most affect whether your base turns out strong or develops problems later.
| Stage | Detail |
| Mix ratio | 1:2:4 (cement:sand:aggregate) |
| Light use | After 3 to 4 days |
| Full strength | After 28 days |
What You’ll Need to Lay a Concrete Base
- Cement, sharp sand, and aggregate in the correct 1:2:4 ratio
- A cement mixer, or a mixing tray and shovel for smaller jobs
- A wheelbarrow for transporting mixed concrete
- A spirit level to check levelling throughout
- A screed board for levelling the poured concrete surface
- A float for finishing the surface smoothly
- Timber formwork to contain the concrete while it sets
- A tamper or vibrating plate, if compacting a larger sub base area
The Correct Concrete Mix Ratio
For a general purpose base, whether it’s for a greenhouse, bin store, log store, or similar garden structure, our standard recommendation is a 1:2:4 ratio of cement to sand to aggregate. This ratio provides a good balance of strength and workability for most typical garden base applications, without being overly complex to mix correctly yourself.
- 1 part cement, the binding agent that holds everything together as it cures
- 2 parts sharp sand, fills gaps between the aggregate and helps with workability
- 4 parts aggregate, typically gravel or crushed stone, provides bulk and strength
Getting the water content right when combining these dry ingredients matters just as much as the ratio itself, which is exactly where a lot of DIY pours run into trouble.
Understanding Why This Ratio Works
It’s worth understanding briefly why this particular balance of materials produces a reliable general purpose base. Cement acts as the binder, chemically reacting with water in a process called hydration, which is what actually causes the mix to harden and gain strength over time rather than simply drying out like a puddle evaporating.
Sand fills the smaller gaps between the larger aggregate particles, improving workability and helping the mix pack together densely, which reduces the risk of weak spots or voids within the cured concrete. The aggregate itself, typically gravel or crushed stone, provides the bulk of the finished material’s compressive strength, since concrete relies heavily on this coarse material to resist the loads placed on it once cured. Getting the proportions of these three elements right, rather than guessing at rough quantities, is what gives a 1:2:4 mix its reliable, well tested balance of strength and workability for standard garden applications.
Choosing the Right Aggregate Size
Not all aggregate is created equal, and choosing the right size for your specific base matters more than many DIYers realise. For a standard garden base, aggregate in the 10mm to 20mm range is typically appropriate, offering a good balance between strength and workability during mixing and pouring. Larger aggregate can make the mix harder to work into corners and against formwork edges, while very fine aggregate can reduce the overall strength of the cured concrete compared with a properly graded mix.
If you’re unsure which aggregate size to use for your specific project, most builders’ merchants can advise based on the intended use of the base, and it’s worth confirming this before purchasing materials rather than assuming any gravel will do.
Step-by-Step: How to Mix and Pour a Concrete Base
Step 1: Prepare and Compact the Sub-Base
Before any concrete gets mixed, make sure the ground beneath your base area is properly excavated, levelled, and compacted. A poorly compacted sub base is one of the most common causes of a concrete base cracking or settling unevenly later, regardless of how well the concrete itself is mixed and poured. This principle applies just as much to garden structure bases as it does to larger projects like shed foundations, where sub base preparation consistently proves to be one of the most important stages of the entire build.
Step 2: Set Up Your Formwork
Build timber formwork around the perimeter of your base area to contain the concrete while it’s poured and setting. Check that your formwork is level and properly secured before you start mixing, since adjusting it after pouring begins is far more difficult.
Step 3: Mix the Concrete to the Correct Ratio
Combine your cement, sand, and aggregate in the 1:2:4 ratio, mixing thoroughly while dry before gradually adding water. This is where the most common DIY mistake happens: adding too much water makes the mix weaker and more prone to cracking as it cures, while too little water makes it difficult to work with and can leave air pockets that weaken the finished base. Aim for a workable, slightly stiff consistency, similar to thick porridge, rather than something runny or crumbly.
Step 4: Pour the Concrete Into the Formwork
Pour the mixed concrete into your prepared formwork, working in manageable sections if you’re covering a larger area, to keep the pour consistent throughout.
Step 5: Level and Screed the Surface
Using your screed board, work along the top of the formwork to level the concrete’s surface, removing excess material and filling any low spots as you go. This step needs to happen relatively soon after pouring, before the concrete begins to firm up.
Step 6: Finish the Surface With a Float
Once screeded, use a float to smooth the surface further, working in slightly overlapping passes to achieve an even, consistent finish across the whole base.
Judging Water Content by Feel
Since getting the water ratio right is genuinely the single biggest factor separating a strong mix from a weak one, it’s worth knowing how to judge consistency by feel rather than relying purely on a fixed measurement, since moisture already present in sand and aggregate can vary between batches. A properly mixed batch should hold its shape reasonably well when a small amount is gathered into a mound, without slumping flat or crumbling apart.
If the mix flows easily and looks glossy or soupy, it’s too wet and needs more dry material added to correct the balance. If it feels crumbly, won’t bind together, or is difficult to work with a shovel, it’s too dry and needs a small, gradual addition of water, mixed in thoroughly before assessing again. Adding water gradually in small amounts, rather than all at once, gives far better control over the final consistency than trying to correct an overly wet mix by adding more dry material afterward.
Working With Ready-Mixed Concrete as an Alternative
For larger base areas, mixing concrete by hand or with a small mixer can become impractical, both in terms of time and achieving a consistent mix across a big pour. Ready mixed concrete, delivered directly to site in the correct ratio and consistency, is worth considering for bigger projects, since it removes the mixing variability entirely and allows a large area to be poured in one continuous session rather than in smaller, potentially inconsistent batches.
The trade off is that ready mixed concrete requires proper access for a delivery vehicle, and the pour needs to be completed relatively quickly once delivered, since the material begins setting on a fixed timeline regardless of how much of the site is ready to receive it. For smaller garden bases, such as a greenhouse or bin store, hand mixing in the correct ratio remains a perfectly practical and cost effective approach.
How Long Does Concrete Take to Cure?
Concrete curing happens in two distinct phases, and it’s important not to rush either one. We typically advise 3 to 4 days before the base can handle light use, such as careful foot traffic, but a full 28 days is needed before the concrete reaches its complete strength.
| Curing Stage | Timeframe | What’s Safe |
| Initial set | 24 to 48 hours | Avoid any contact or weight |
| Light use | 3 to 4 days | Careful foot traffic only |
| Full strength | 28 days | Full structural loading, building on top |
Building anything substantial on top of the base, or exposing it to significant weight, before this 28 day period is complete risks cracking or weakening the concrete before it’s had the chance to fully harden.
How Weather Affects Curing Beyond the Day of the Pour
While avoiding rain and frost during the pour itself is well understood, it’s worth knowing that weather conditions continue to affect concrete throughout the full curing period, not just on the day it’s poured. Hot, dry weather in the days following a pour can cause the surface to dry out too quickly relative to the concrete beneath it, which can lead to surface cracking even when the underlying mix and sub base were done correctly.
Covering freshly poured concrete with damp hessian, plastic sheeting, or a specialist curing compound during hot weather helps slow surface moisture loss and allows the whole slab to cure more evenly. In cold weather, particularly where overnight frost is a risk within the first few days after pouring, covering the concrete with insulating material helps protect it from freezing before it’s developed sufficient strength to withstand low temperatures without damage.
Common Mistakes When Mixing and Pouring Concrete
Based on the repair jobs we’ve handled on failed DIY concrete bases, three mistakes consistently show up, often together on the same project.
- Mixing too wet or too dry. Getting the water ratio wrong is the single biggest factor in a weak or poorly workable mix, directly affecting the finished base’s strength and durability.
- Not compacting the sub-base properly before pouring. Even a perfectly mixed batch of concrete poured onto a loosely compacted sub base is likely to crack or settle unevenly as that ground shifts beneath it.
- Pouring in bad weather. Heavy rain can wash out and weaken the surface of freshly poured concrete, while frost can seriously damage concrete that hasn’t had a chance to properly set, sometimes ruining the entire pour.
- Rushing the finishing stage. Screeding and floating too quickly, or too far after the pour once the mix has already begun firming up, can leave an uneven or poorly bonded surface finish.
- Building on the base before it’s fully cured. Placing significant weight or structures on a base within the 28 day full curing window risks cracking or weakening the concrete before it’s reached its designed strength.
In our experience, DIY concrete bases that develop problems usually combined more than one of these issues at once, which is why getting all three right together matters more than focusing on just one.
Case Study: Fixing a Cracked DIY Concrete Base
We were called out to a garden in South East London where a customer’s DIY concrete base for a bin store had developed significant cracking within just a few months of being poured.
What we found:
| Issue | Detail |
| Mix consistency | Too wet, weakening overall strength |
| Sub-base | Not properly compacted before pouring |
| Weather during pour | Poured during a period of heavy rain |
The customer had mixed the concrete slightly too wet to save time on the job, poured it onto ground that hadn’t been thoroughly compacted, and completed the pour during a spell of unexpectedly heavy rain. All three factors together resulted in a base that cracked significantly within its first few months.
What we did: We broke out the failed section, properly compacted the sub base this time, and repoured using the correct 1:2:4 mix ratio at the right water consistency, timing the work to avoid poor weather conditions during the pour and initial curing period.
Result: The repoured base has remained crack free and stable, supporting the bin store without any of the issues that affected the original DIY attempt. This case is a clear reminder of why mix ratio, sub base preparation, and weather timing all need to be right together, not just one or two out of three.
Concrete Bases for Different Garden Structures
While the 1:2:4 ratio and general technique covered here applies broadly, it’s worth noting that the specific requirements can vary slightly depending on what you’re building the base for. A greenhouse typically needs a base with careful attention to level and drainage, since even minor unevenness can affect door alignment and glazing over time. A bin store base needs to withstand regular impact and scraping from bins being moved on and off it, which makes a well finished, properly cured surface particularly important. A log store base benefits from good drainage consideration to keep stored wood from sitting in damp conditions, sometimes incorporating a slight raised edge or drainage channel around the perimeter as part of the design.
For larger or more structurally demanding projects, such as a workshop shed or a base intended to support significant ongoing weight, it’s worth considering whether a deeper, potentially reinforced foundation is more appropriate than a standard garden base, which is covered in more detail in our guide on larger shed foundations.
Frequently Asked Questions
What’s the correct concrete mix ratio for a base?
A general purpose base typically uses a 1:2:4 ratio of cement, sand, and aggregate, which provides a good balance of strength and workability for most garden structures.
How long does concrete need to cure before use?
Allow 3 to 4 days before light use, such as careful foot traffic, and a full 28 days before the concrete reaches its complete strength and can handle full structural loading.
Can I pour concrete in bad weather?
It’s best avoided. Heavy rain can wash out and weaken freshly poured concrete, while frost can seriously damage concrete that hasn’t had time to properly set.
Why did my concrete base crack?
Common causes include mixing the concrete too wet, pouring onto an improperly compacted sub base, or pouring during bad weather. These issues often occur together rather than in isolation.
What tools do I need to lay a concrete base myself?
You’ll need a cement mixer or mixing tray, a wheelbarrow, a spirit level, a screed board, a float for finishing, and timber formwork to contain the concrete while it sets.
Should I use hand-mixed or ready-mixed concrete for my base?
Hand mixing works well for smaller garden bases and gives more flexibility on timing, while ready mixed concrete is generally better suited to larger areas where a large, consistent pour needs completing in one continuous session.
What aggregate size should I use for a garden base?
Aggregate in the 10mm to 20mm range is typically appropriate for a standard garden base, offering a good balance between workability and finished strength.
Get a Free Quote for Your Concrete Base Project
If you’d rather leave the mixing, pouring, and curing to experienced professionals, JPD Landscaping & Building Services offers free quotes across South East London.