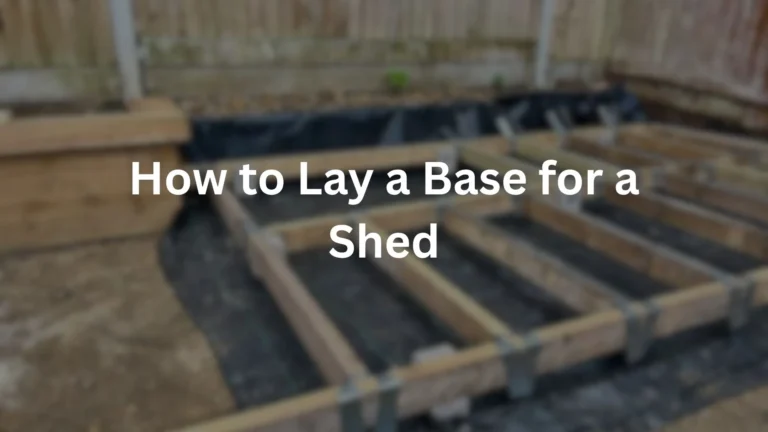

The concrete mix itself gets most of the attention when people plan a slab project, but the formwork, the timber or edging that shapes and contains the concrete while it sets, is just as important to get right. Poorly built formwork is one of the most common reasons a DIY concrete slab ends up with a bowed edge, an uneven surface, or a finished shape that doesn’t match what was actually planned.
At JPD Landscaping & Building Services, we’ve built formwork for concrete slabs across South East London for over 15 years, from straightforward rectangular slabs to ones with curved edges. This guide focuses specifically on formwork and edging technique, covering the materials to use, how to handle curves, proper bracing, and a real example of what happens when formwork isn’t secured properly.
Building Formwork for a Concrete Slab
For a standard rectangular slab, 18mm treated timber or shuttering ply makes solid, reliable formwork. For curved edges, the right material depends on how tight the curve is, ranging from flexible plywood strips to bending board for gentler curves. Whatever material you use, the formwork needs to be properly staked with wooden pegs driven into the ground and screwed to the formwork itself, since this is the single most common point of failure in a DIY slab pour.
| Formwork Type | Material |
| Straight edges | 18mm treated timber or shuttering ply |
| Curved edges | Varies by curve tightness (flexible ply, bending board, etc.) |
| Securing formwork | Wooden pegs or stakes, screwed to the formwork |
Why Formwork Matters More Than People Expect
It’s easy to think of formwork as just a temporary container for wet concrete, something that gets removed and forgotten once the pour is done. In reality, formwork directly determines the finished shape, edge quality, and level accuracy of your entire slab. Wet concrete is genuinely heavy, and it exerts real outward pressure on whatever’s containing it as it’s poured and settled. Formwork that isn’t strong enough, or isn’t properly secured, will move under that pressure, and once it moves, there’s no fixing the edge shape after the pour without breaking it out and starting again.
This is exactly why formwork deserves just as much planning attention as the concrete mix itself, which is covered in more detail in our guide on how to lay a concrete base if you’re looking for the full pouring and curing process alongside the formwork stage covered here.
Formwork Materials for Straight Edges
For a standard rectangular slab with straight edges, 18mm treated timber or shuttering ply is a reliable, widely available choice. It’s sturdy enough to resist the outward pressure of wet concrete when properly staked, while still being manageable to cut and position accurately along your marked slab dimensions.
- 18mm treated timber or shuttering ply, good general purpose choice, strong and straightforward to work with for rectangular shapes.
- Position formwork accurately along your marked lines before securing, checking corners are properly square using a set square or the classic 3-4-5 measuring method.
Understanding the 3-4-5 Method for Square Corners
Since squaring up formwork corners accurately is such a foundational step, it’s worth explaining the 3-4-5 method in a bit more detail, since it’s a simple, reliable technique that doesn’t require any specialist tools. The principle relies on the mathematical fact that a triangle with sides measuring 3, 4, and 5 units, in any consistent unit of measurement, always forms a perfect right angle at the corner between the 3 and 4 unit sides.
In practice, this means measuring 3 units along one edge of your formwork from the corner, 4 units along the adjacent edge from the same corner, and then checking the diagonal distance between those two points measures exactly 5 units. If it does, the corner is genuinely square. If the diagonal measurement is off, the corner needs adjusting until it matches, giving a far more reliable result than trying to judge squareness by eye alone.
Choosing Timber Thickness and Depth
While 18mm is a solid general purpose thickness for most garden slab projects, it’s worth knowing when a thicker or thinner board might be more appropriate. For shallow pours, typically under 75mm deep, slightly thinner timber can sometimes be adequate, though 18mm remains a safe, reliable default that resists bowing well across most standard garden project depths.
For deeper pours, such as the 100mm to 300mm depths often used for shed bases or larger structural foundations, it’s worth considering thicker formwork material, or at minimum ensuring peg spacing is tightened further to compensate for the increased outward pressure a taller column of wet concrete exerts. The general rule is that deeper pours need either stronger formwork, closer staking, or ideally both together, rather than assuming standard 18mm timber and standard peg spacing will automatically scale up to handle a significantly deeper pour without issue.
Formwork for Curved Edges
Curved slab edges genuinely need a different approach than straight ones, and the right material really does depend on how tight the curve is. Gentle, sweeping curves can often be achieved with flexible bending board or hardboard, which flexes smoothly without needing modification. Tighter curves typically need flexible plywood strips that have been kerfed, meaning shallow cuts scored partway through the material at intervals, allowing it to bend more sharply without cracking or splitting.
| Curve Tightness | Suitable Formwork Material |
| Gentle, sweeping curves | Flexible bending board or hardboard |
| Tighter curves | Kerfed plywood strips |
Getting curved formwork right often takes a bit more patience than straight formwork, since you’re working the material into shape gradually rather than simply cutting and positioning straight lengths.
How Kerfing Actually Works
For anyone unfamiliar with the technique, kerfing involves making a series of shallow, evenly spaced cuts partway through the thickness of a plywood strip, typically along the face that will sit on the inside of the curve. These cuts don’t go all the way through the material, they simply reduce its resistance to bending at each cut point, allowing the overall strip to flex into a tighter radius than the same uncut material could achieve without cracking.
Spacing between kerf cuts generally needs to be closer together for tighter curves and can be spaced further apart for gentler ones. It’s worth practising kerf spacing on an offcut of the same material before committing to your final formwork piece, since getting the spacing right for your specific curve radius often takes a bit of trial and adjustment rather than following a single fixed measurement for every curve.
How to Secure and Brace Formwork Properly
This is the step that makes the biggest difference to whether your finished slab edge comes out straight, level, and accurate to your original plan. Wooden pegs or stakes, driven firmly into the ground at regular intervals along the formwork’s length, then screwed directly into the formwork itself, provide the support needed to resist the outward pressure of wet concrete during the pour.
- Space pegs closely enough along longer runs of formwork to prevent bowing between fixing points, particularly important on taller formwork holding a deeper pour.
- Drive pegs firmly into solid ground, checking they’re not simply sitting in loose or recently disturbed soil that won’t hold them securely.
- Screw formwork directly to the pegs, rather than relying on the pegs alone to hold everything in position through friction or contact.
- Check level and alignment again after staking, since the process of driving pegs in can sometimes shift formwork slightly out of position.
How Peg Spacing Should Change With Pour Depth
It’s worth being specific about how peg spacing needs to adjust for different pour depths, since this is exactly where a lot of DIY formwork underestimates the pressure involved. For a shallow, standard garden slab pour, pegs spaced at roughly 600mm to 900mm intervals are often sufficient for straightforward 18mm formwork. For deeper pours, such as those used for shed foundations or thicker structural bases, this spacing typically needs tightening considerably, sometimes down to 400mm to 500mm intervals or closer, since a deeper column of wet concrete exerts significantly more outward pressure against the formwork than a shallow pour of the same length.
If in doubt, erring toward closer peg spacing rather than wider is always the safer choice, since the cost of a few extra pegs and a bit more time is minor compared with the disruption and material waste of a bowed formwork edge partway through a pour.
The Most Common Formwork Mistake: Not Properly Staking It
Of all the mistakes we see on DIY concrete slab projects, formwork that isn’t properly staked, bowing or shifting under the weight of wet concrete, causes the most consistent problems. It’s an easy step to underestimate, since the formwork often looks perfectly solid and secure before any concrete is actually poured against it.
The problem becomes obvious partway through pouring, once the formwork starts visibly bulging outward under the concrete’s weight, at which point it’s often too late to fix without significant disruption to the pour already underway. This is exactly why taking the time to properly stake and brace formwork before pouring begins matters so much, even though it might feel like an unnecessary extra step when the formwork looks fine standing empty.
Other Formwork Mistakes to Avoid
- Formwork not level, throwing off the entire slab surface. Since the top edge of your formwork typically guides your screed board during levelling, any inaccuracy here carries directly through to the finished slab surface.
- Gaps in formwork joints, allowing concrete to leak and lose its edge shape. Poorly sealed joints between formwork sections can let wet concrete seep through, softening and distorting the intended edge line.
- Reusing warped or damaged timber without checking it first. Old or previously used formwork timber can develop a slight bow or twist over time, which transfers directly into the finished slab edge if used without inspection.
- Removing formwork too early. Stripping formwork away before the concrete has developed sufficient initial strength can cause the still soft edges to slump or lose their shape, undoing the careful work put into building it in the first place.
When to Remove Formwork After Pouring
Timing formwork removal correctly is worth covering specifically, since removing it too early is a genuine risk to the finished edge quality. As a general guide, formwork can typically be safely removed after around 24 to 48 hours, once the concrete has developed enough initial strength to hold its shape without support, though this can vary depending on weather conditions and the specific concrete mix used.
In cooler weather, curing slows down, and it’s worth extending this window slightly to be safe rather than risking a still soft edge slumping once support is removed. If in doubt, it’s generally better to leave formwork in place a little longer than strictly necessary rather than removing it prematurely and risking damage to an edge that’s taken real effort to get right in the first place.
Case Study: Fixing a Bowed Formwork Slab Edge
We were called out to a garden in South East London where a customer’s DIY concrete slab, intended for a small patio area, had a noticeably bowed edge along one side after the concrete had set.
What we found:
| Detail | Specification |
| Formwork material | 18mm timber, correctly chosen |
| Staking | Minimal, pegs spaced too far apart |
| Result | Formwork bowed outward under wet concrete weight along one edge |
The customer had actually chosen appropriate formwork material, but hadn’t spaced the securing pegs closely enough along one longer run of formwork. Under the weight of the wet concrete during the pour, that section bowed noticeably outward, leaving a visibly curved edge on what was meant to be a straight sided slab.
What we did: We broke out the affected edge section, rebuilt the formwork with pegs spaced significantly closer together and properly screwed to the timber, then repoured that section to match the correct, straight edge line.
Result: The repaired section now sits flush and straight with the rest of the slab, with no visible sign of the original bowing issue. This case is a clear reminder that even the right formwork material can fail if it isn’t secured with enough support points to resist the real pressure wet concrete puts on it.
Planning Formwork Alongside Your Wider Project
Formwork technique matters just as much whether you’re pouring a small patio slab, a base for a garden structure, or preparing for a larger project like a shed foundation. If your project also involves managing a slope or level change across the garden, it’s worth reading our guide on retaining wall installation alongside this one, since formwork principles around bracing and staking apply in a broadly similar way to retaining structures, even though the overall design and purpose differs considerably.
Frequently Asked Questions
What material should I use for concrete slab formwork?
For straight edges, 18mm treated timber or shuttering ply works well. For curved edges, the right material depends on how tight the curve is, ranging from flexible bending board for gentle curves to kerfed plywood for tighter ones.
How do I secure formwork so it doesn’t move during pouring?
Drive wooden pegs firmly into the ground at regular intervals along the formwork, then screw the formwork directly to the pegs. This resists the outward pressure wet concrete places on it during the pour.
Why did my concrete slab edge come out bowed?
This is usually caused by formwork that wasn’t properly staked, with pegs spaced too far apart to resist the weight and pressure of wet concrete during the pour.
Can I use plywood for curved concrete edges?
Yes, flexible plywood strips, often kerfed with shallow scored cuts, can be bent to form tighter curves, while gentler curves can often be achieved with flexible bending board.
Does formwork need to be perfectly level?
Yes, since the top edge of your formwork typically guides the screeding process, any unevenness in the formwork itself will carry through directly to the finished slab surface.
How do I check that formwork corners are properly square?
The 3-4-5 method is a reliable way to check this without specialist tools, measuring 3 units along one edge and 4 along the adjacent edge from the corner, then confirming the diagonal between those points measures exactly 5 units.
How long should formwork stay in place before removal?
Formwork can typically be removed after around 24 to 48 hours once the concrete has developed sufficient initial strength, though this can extend in cooler weather where curing takes longer.
Get a Free Quote for Your Concrete Slab Project
If you’d rather leave the formwork and pouring to experienced professionals, JPD Landscaping & Building Services offers free quotes across South East London.