Not every shed project needs a full concrete pour. If you’re looking to avoid the mixing, pouring, and curing time that comes with concrete, there’s a genuinely solid alternative worth considering: a plastic shed base grid system. It’s fast to install, needs no curing time at all, and works well for a good number of standard garden sheds.
At JPD Landscaping & Building Services, we’ve installed shed bases across South East London for over 15 years, including plastic grid systems for customers who wanted a quicker, concrete free alternative. This guide explains exactly how these systems work, when they’re the right choice, and the mistakes that cause the most problems if the installation is rushed.
How to Make a Shed Base Without Concrete
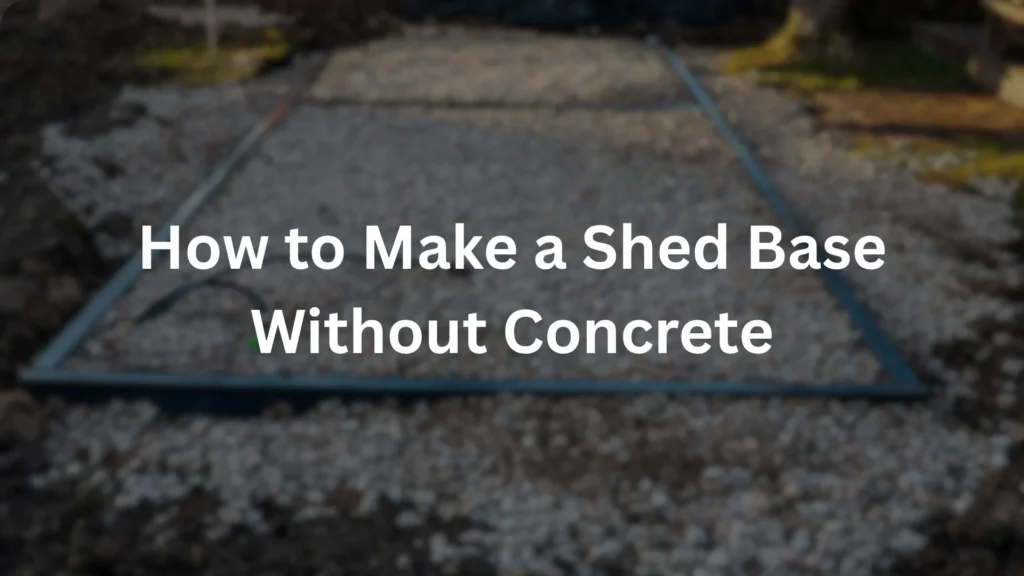
The best no concrete shed base option for most gardens is a plastic interlocking grid system. These grids sit directly on prepared, compacted ground, are filled with gravel or aggregate, and provide a stable, well draining surface for a shed without any mixing, pouring, or curing time. They’re best suited to small or light sheds, and aren’t recommended for larger, heavier structures.
| Base Type | Curing Time | Best For |
| Plastic grid system | None, ready immediately after installation | Small, light sheds |
| Concrete slab | 3 to 4 days light use, 28 days full strength | Larger, heavier sheds |
Why Plastic Grid Systems Are the Best No-Concrete Option
The main appeal of a plastic grid base is simple: fast installation with no curing time needed. Unlike concrete, which needs days before light use and a full 28 days to reach complete strength, a plastic grid base is ready to have a shed placed on it almost as soon as installation is finished. For anyone wanting to avoid the waiting period concrete requires, this makes a real practical difference to project timelines. For a full comparison against the concrete route, our guide on how to build a shed base covers that process step by step alongside this grid based alternative.
- No mixing or pouring required. The grids come as pre made interlocking panels, removing the need for any concrete mixing equipment or technique.
- No curing time. Since there’s no concrete involved, there’s no waiting period before the base can be used, unlike a concrete slab that needs weeks to reach full strength.
- Straightforward DIY installation. The interlocking design makes these systems genuinely accessible for confident DIYers without specialist construction experience.
How Plastic Grid Shed Bases Work
Plastic grid systems consist of interlocking panels that sit on top of prepared, compacted ground. Once positioned and connected together, the open cells within each grid panel are filled with gravel or a similar aggregate material, which locks into place within the grid structure to create a stable, load bearing surface.
This design allows water to drain straight through the base rather than pooling on top, which is a genuine advantage over a solid concrete or paving surface in gardens where drainage is already a bit of a concern.
What Grid Panels Are Actually Made From
Most plastic grid systems are manufactured from high density polyethylene or a similar durable, weather resistant plastic, chosen specifically for its ability to withstand repeated freeze thaw cycles, UV exposure, and sustained ground contact without degrading over time. The honeycomb style cell structure within each panel is engineered to distribute weight evenly across the filled aggregate, rather than concentrating load at any single point, which is part of what allows a relatively thin plastic grid to support meaningful weight when properly filled and installed.
Panel thickness and cell depth vary between manufacturers and product ranges, generally correlating with how much load the specific system is rated to support, so it’s worth checking a manufacturer’s stated weight rating against your specific shed’s requirements before purchasing, rather than assuming all grid products offer identical performance.
The Main Limitation: Not Suitable for Larger, Heavier Sheds
It’s important to be upfront about where plastic grid bases fall short. They’re genuinely well suited to small or light sheds, but they’re not recommended for larger, heavier structures. The grid system simply isn’t designed to distribute and support the kind of concentrated weight a bigger shed, particularly one storing heavy equipment or machinery, places on the ground beneath it.
If you’re planning anything beyond a standard small garden shed, it’s worth considering a concrete slab base instead, which offers the strength and load bearing capacity that larger structures genuinely need. For workshop sheds or anything storing significant equipment weight, our guide on larger shed foundations covers what a properly engineered, deeper foundation involves for that scale of project.
| Shed Size or Weight | Suitable for Plastic Grid? |
| Small, light garden shed | Yes, generally well suited |
| Medium shed, general storage | Case by case, worth assessing |
| Large shed or workshop | No, concrete slab recommended instead |
Plastic Grid vs Paving Slabs: Which Should You Choose?
Since both are viable no concrete options for smaller sheds, it’s worth comparing them directly. Plastic grid systems offer faster installation and no curing wait, along with genuinely excellent drainage since water passes straight through the aggregate fill rather than sitting on a solid surface. Paving slabs, by contrast, offer a completely flat, hard surface that some people prefer aesthetically, and can feel more solid underfoot compared with a gravel filled grid surface, though installation takes somewhat longer and requires more precise levelling work slab by slab.
Neither option is objectively superior, the right choice often comes down to whether drainage or a completely flat, hard surface matters more for your specific garden and shed, along with how much time you want to spend on installation. Our guide on laying a paving slab shed base covers that alternative process in full if you’re still weighing up both options.
Step-by-Step: Installing a Plastic Grid Shed Base
Step 1: Mark Out and Excavate the Area
Measure and mark your shed’s footprint, allowing a small overhang as you would with any shed base. Excavate the marked area to an appropriate depth to accommodate the ground preparation and grid panels together.
Step 2: Compact the Ground Thoroughly
This step matters just as much here as it does for a concrete or paving base. Compact the excavated ground thoroughly before laying anything on top, since a poorly compacted base undermines the stability of the grid system above it, regardless of how well the grid itself is installed.
Step 3: Lay and Interlock the Grid Panels
Position the grid panels across the prepared area, interlocking them together according to the manufacturer’s instructions to form a continuous, connected surface across your entire base area.
Step 4: Fill the Grid Cells
Fill the open cells within the grid using the appropriate gravel or aggregate material specified by the manufacturer. This filling material is what actually bears the load once the shed is in place, so using the right type and size of material matters more than it might initially seem.
Choosing the Right Aggregate for Grid Fill
Since the aggregate fill is what actually carries the shed’s weight once installed, it’s worth understanding what makes a suitable choice. Angular, crushed aggregate, typically in a similar size range to that used for standard sub bases, tends to interlock and compact within the grid cells more effectively than smooth, rounded gravel, which can shift and settle more easily under sustained load.
Manufacturers typically specify a recommended aggregate size and type for their specific grid system, and it’s worth following this guidance closely rather than using whatever gravel happens to be available, since the wrong aggregate choice can significantly undermine the load bearing performance the grid system is designed to provide.
Do You Still Need a Membrane Underneath the Grid?
A weed suppressant membrane laid beneath the grid panels, directly on the compacted ground, is generally a worthwhile addition even though it isn’t always strictly required by every manufacturer’s installation guidance. This membrane helps prevent weeds establishing up through the aggregate fill over time, while still allowing water to drain through freely into the ground below.
It’s a relatively low cost, low effort addition to the installation process, and given how much more disruptive it is to address weed growth after a shed is already sitting on top of the finished base, it’s generally worth including as standard practice rather than treating it as an optional extra.
Common Mistakes When Installing a Plastic Grid Shed Base
Based on the repair callouts we’ve had for grid base issues, a few mistakes come up consistently, often together on the same installation.
- Not compacting or levelling the ground enough before laying the grid. A grid system laid on poorly prepared ground will still shift and settle unevenly over time, since the grid itself relies on stable ground beneath it.
- Filling grid cells with the wrong material. Using aggregate that’s too fine can wash away or compact poorly within the grid cells, undermining the load bearing surface the system is designed to provide.
- Installing on ground that isn’t well draining to begin with. While the grid system itself drains well, installing it on naturally poor draining ground can lead to water pooling beneath the base rather than draining away properly.
- Skipping the weed membrane. While not always mandatory, omitting this layer can lead to weed growth establishing through the aggregate over the following seasons.
- Using an undersized or under-rated grid system for the shed’s weight. Assuming all grid products offer identical load capacity, without checking manufacturer specifications against the shed’s actual weight, can result in a base that isn’t genuinely suited to the structure placed on it.
In our experience, these issues tend to appear together, since rushing ground preparation often goes hand in hand with less attention to material choice further along in the installation.
Maintaining a Plastic Grid Shed Base Over Time
Once installed, a plastic grid base generally requires very little ongoing maintenance compared with concrete or paving options. It’s worth periodically checking that the aggregate fill hasn’t washed out or become depleted in any cells, particularly around the base’s edges where exposure to the elements is greatest, and topping up with matching aggregate where needed.
Since these bases are inherently well draining, waterlogging issues are rare, though it’s still worth checking occasionally that the surrounding ground hasn’t developed a drainage pattern that channels excessive water toward the base over time, since even a well draining system can be overwhelmed by a genuinely significant, sustained water flow from poor garden drainage elsewhere.
Case Study: A Plastic Grid Base for a Small Garden Shed
One of our typical no concrete shed base projects involved a customer in South East London installing a small garden shed and wanting to avoid the waiting time associated with a concrete pour.
Project details:
| Detail | Specification |
| Shed size | 6ft x 4ft |
| Base type | Plastic interlocking grid system |
| Ground preparation | Excavated and thoroughly compacted before grid installation |
| Grid fill material | Correctly sized gravel aggregate, per manufacturer guidance |
What we did: After confirming the shed’s small size and weight made it a suitable candidate for a grid base, we excavated and thoroughly compacted the ground, laid and interlocked the grid panels, then filled the cells with the correct grade of gravel aggregate.
Result: The customer had a stable, well draining base ready for their shed on the same day, without any of the curing wait time a concrete base would have required. This case is a good example of how a grid system can genuinely deliver a faster, simpler alternative when the shed itself is the right size and weight for this approach.
Is a Plastic Grid Base Right for Your Shed?
If you’re weighing up whether this approach suits your own project, it helps to think through a few honest questions first. Is your shed genuinely small and lightweight, without heavy stored equipment or machinery planned for the future? Is fast installation, without a multi day or multi week wait, a genuine priority for your project timeline? Is your garden’s natural drainage reasonably good to begin with, rather than an area that already struggles with standing water after rain?
If the answer to these is broadly yes, a plastic grid system is very likely to be a strong fit. If you’re planning a larger structure, storing significant equipment weight, or dealing with genuinely poor draining ground, it’s worth discussing a concrete slab base instead as part of a proper site assessment, since matching the base type to the actual demands of the project is what determines whether it performs well for years to come.
Frequently Asked Questions
Can I build a shed base without concrete?
Yes, a plastic interlocking grid system is a solid no concrete alternative, providing a stable base with no mixing, pouring, or curing time required.
Is a plastic grid base as strong as concrete?
Plastic grid bases work well for small, lighter sheds, but they’re not recommended for larger, heavier structures, which benefit from the stronger load bearing capacity of a concrete slab.
Do I still need to prepare the ground for a grid base system?
Yes, thorough excavation and compaction of the ground beneath the grid is just as important as it is for a concrete or paving base, since the grid still relies on stable ground underneath.
What should I fill the grid cells with?
Use the gravel or aggregate material specified by the manufacturer. Using material that’s too fine can wash away or compact poorly, undermining the base’s stability.
How long does a plastic grid shed base take to install?
Since there’s no concrete involved, there’s no curing time required. The base is ready for the shed almost immediately after installation, once ground preparation and grid assembly are complete.
Should I use a weed membrane under a plastic grid base?
While not always strictly required, a membrane laid beneath the grid helps prevent weed growth through the aggregate over time while still allowing proper drainage, so it’s generally worth including.
How do I know if my shed is too heavy for a plastic grid base?
Check the manufacturer’s stated weight rating for the specific grid system against your shed’s weight, including any equipment or heavy items you plan to store inside, rather than assuming all grid products offer the same load capacity.
Get a Free Quote for Your Shed Base Project
Whether you’re considering a plastic grid, paving slab, or concrete shed base, JPD Landscaping & Building Services offers free quotes across South East London.