Once your shed base is down, whether that’s concrete, paving slabs, or another suitable foundation, the next stage is building the actual floor structure that sits on top of it. This is a distinct step from the base itself, involving bearers or joists that raise the floor slightly and provide the surface your flooring material attaches to. Getting this part right matters just as much as the base underneath it, since problems here tend to show up as rot, sagging, or moisture damage over time.
At JPD Landscaping & Building Services, we’ve built shed floor structures across South East London for over 15 years. This guide focuses specifically on the floor itself, covering bearer sizing, joist spacing, flooring material, and the mistake that causes more shed floor problems than almost anything else.
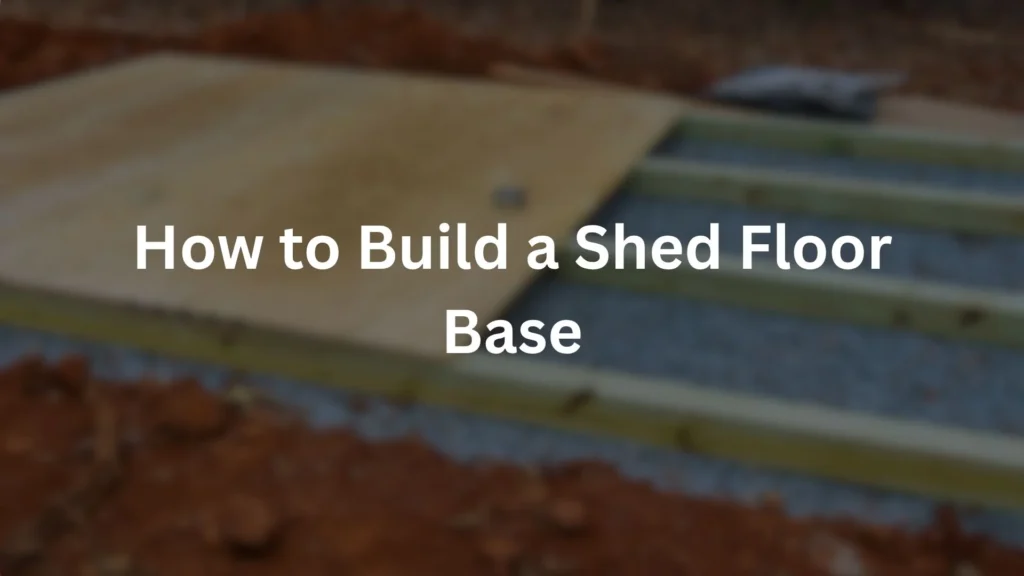
Building a Shed Floor Base
For a standard shed floor structure, use 47mm x 75mm timber bearers or joists, spaced at 450mm centres, with 18mm OSB or plywood sheet flooring laid on top. The most important precaution to take is leaving a proper gap between the bearers and the base or ground beneath them, since skipping this is the leading cause of trapped moisture and subsequent rot in shed floors.
| Component | Specification |
| Bearer or joist size | 47mm x 75mm |
| Bearer or joist spacing | 450mm centres |
| Flooring material | 18mm OSB or plywood sheet flooring |
| Critical precaution | Leave a gap between bearers and base or ground |
Why the Floor Structure Is a Separate Step From the Base
It’s worth being clear about this distinction, since it’s easy to think of the shed base as covering everything from ground level up to the shed floor. In reality, the base, whether concrete or paving slabs, is the foundation that supports everything above it. The floor structure, built from bearers or joists topped with flooring material, is a distinct layer that sits on top of that base, and it comes with its own set of considerations around sizing, spacing, and moisture protection that are separate from base construction itself. If you haven’t yet settled on your base type, our guide on how to build a shed base covers that earlier stage in full before this floor structure goes on top.
Choosing Bearer and Joist Sizing
For most standard shed floor projects, 47mm x 75mm timber provides a solid, reliable size for bearers and joists. This dimension offers good strength for typical shed floor spans without being unnecessarily oversized for the loads a standard garden shed floor needs to support.
When Larger Bearers Are Worth Considering
While 47mm x 75mm suits the vast majority of standard garden sheds, it’s worth knowing when a larger dimension might be more appropriate. For bigger sheds with longer unsupported spans between bearers, or for structures intended for workshop use with heavier stored equipment, stepping up to a larger section, such as 47mm x 100mm or beyond, provides additional strength and reduces the risk of flex or bounce across a wider floor area. This is worth discussing alongside the base thickness itself if you’re planning anything beyond a standard general storage shed, since floor structure and base specification both need to reflect the same anticipated load.
Bearer and Joist Spacing
We typically space floor bearers or joists at 450mm centres. This spacing provides adequate support for standard 18mm flooring sheets without excessive flex or bounce underfoot, while still being a practical, material efficient spacing that doesn’t use more timber than the floor structure actually needs.
Wider spacing than this can lead to flooring that flexes or sags over time under regular foot traffic and stored items, particularly as the flooring material itself experiences normal wear across its lifespan.
Why 450mm Centres Specifically
It’s worth understanding briefly why 450mm has become such a widely used standard for this application, rather than an arbitrary figure. This spacing corresponds neatly with standard sheet material dimensions, typically 1200mm or 2400mm depending on orientation, meaning sheet edges land cleanly on a bearer at a sensible interval without excessive offcut waste or oddly placed joints. It also strikes a practical balance between structural support and material use, since spacing much wider than this starts to noticeably increase flex in standard 18mm sheet flooring, while spacing much closer offers only a marginal stiffness improvement for a meaningfully higher timber cost.
Choosing Flooring Material
18mm OSB or plywood sheet flooring is our standard recommendation for the layer that sits directly on top of the bearers or joists. This thickness provides a solid, stable surface capable of handling typical shed use, including foot traffic and stored items, without excessive flex between the underlying bearers.
| Flooring Consideration | Detail |
| Standard thickness | 18mm |
| Common materials | OSB or plywood sheet flooring |
| Fixed to | Bearers or joists spaced at 450mm centres |
OSB vs Plywood: Which Should You Choose?
Both OSB and plywood are widely used for shed flooring, and each has genuine advantages worth weighing up. OSB is generally more cost effective and offers good structural strength for the price, making it a popular choice for standard garden shed floors where budget is a meaningful consideration. Plywood typically offers a smoother, more consistent surface and can handle repeated moisture exposure slightly better in certain grades, which can be worth the extra cost for a shed that’s likely to see heavier use or slightly damper conditions.
For most standard garden storage sheds, either material performs well when properly installed with adequate ventilation beneath, so the choice often comes down to budget and specific preference rather than one being definitively superior for typical use.
The Critical Step: Leaving a Gap Beneath the Bearers
This is, without question, the single most important precaution when building a shed floor structure, and it’s the mistake we see cause the most problems by a clear margin. Bearers or joists placed directly against the base or ground beneath them, without any gap for airflow, trap moisture underneath. Over time, this trapped moisture leads to rot developing in the bearers themselves, often well before any visible signs appear on the flooring surface above.
Leaving a proper air gap beneath the bearers allows moisture to evaporate and disperse naturally, rather than sitting trapped against the timber. This single step does more to protect your shed floor’s long term condition than almost any other decision made during the floor structure build. This is closely related to the same drainage and airflow principles covered in our guide on wood decking lifespan, where trapped moisture beneath a structure is consistently the leading cause of early rot, regardless of whether it’s a deck or a shed floor.
- Correct approach: Bearers raised slightly off the base or ground, with a genuine air gap maintained beneath them for ventilation.
- Risky approach: Bearers placed flush against the base or ground with no gap, trapping moisture and accelerating rot from underneath.
How to Actually Create the Air Gap
There are a few practical ways to achieve a proper air gap beneath shed floor bearers, and it’s worth knowing the options rather than assuming there’s only one correct method. Placing bearers on small plastic or composite packers, sometimes called shed base risers, spaced along their length, is a straightforward and widely used approach that lifts the timber clear of the base surface while remaining stable and level.
Alternatively, for bases built with this in mind from the outset, a shallow void or slightly raised support point built into the base design itself can achieve the same result. Whichever method is used, the key principle stays the same: air needs to be able to circulate freely beneath the full length of every bearer, not just at isolated points, since a gap that’s blocked or restricted along parts of its length can still allow moisture to become trapped in those specific sections.
Ventilation Beyond Just the Air Gap
While the gap beneath the bearers is the most critical element, it’s worth thinking about ventilation for the floor structure more broadly. Some shed designs incorporate small vents or gaps at the base of the shed walls, allowing air to move through the void beneath the floor rather than simply sitting still in an enclosed space. Where a shed design allows for this, it’s worth ensuring these vents aren’t inadvertently blocked by nearby planting, stored items pressed against the shed’s exterior, or debris that accumulates against the base over time, since restricted airflow reduces the effectiveness of the moisture management the air gap is specifically designed to provide.
Step-by-Step: Building the Shed Floor Structure
Step 1: Position the Perimeter Bearers
Start by laying out the outer perimeter bearers around your base’s edges, making sure they’re raised slightly with a proper air gap maintained beneath them rather than sitting flush against the base surface.
Step 2: Install the Internal Joists at 450mm Centres
Add internal joists running across the frame at 450mm centre spacing, providing consistent support across the full floor area for the flooring sheets to be laid on top.
Step 3: Check Everything Is Level
Before laying any flooring material, check the entire bearer and joist frame is level in all directions, since any inconsistency here will carry through directly to the finished floor surface.
Step 4: Lay the Flooring Sheets
Fix your 18mm OSB or plywood sheets across the bearer and joist frame, making sure joints between sheets fall directly over a bearer or joist for proper support and a stable, secure fixing point.
Fixing the Flooring Sheets Correctly
Beyond simply positioning sheet joints over a bearer, it’s worth using the right fixings and spacing when securing flooring to the frame beneath. Galvanised or coated screws, rather than uncoated fixings, resist corrosion far better given the outdoor, moisture exposed environment a shed floor sits within, even with proper ventilation in place.
Fixing points should be spaced consistently along each bearer, typically every 200mm to 300mm along sheet edges and slightly wider across the sheet’s middle span, to prevent the flooring from lifting, squeaking, or flexing excessively at unsupported points between fixings over time.
Common Mistakes When Building a Shed Floor Structure
Beyond the critical air gap issue covered above, a couple of other mistakes are worth watching for.
- Joist spacing too wide. Spacing joists further apart than recommended can lead to flooring that flexes or sags over time, particularly under regular foot traffic and stored weight.
- Not treating or protecting bearers against moisture before installing. Even with a proper air gap, using untreated timber for bearers reduces their natural resistance to any residual moisture exposure they’ll still face in an outdoor structure.
- Insufficient or inconsistent fixing spacing on flooring sheets. Skipping fixings or spacing them too widely can lead to flooring that lifts, squeaks, or flexes at unsupported points between bearers.
- Blocking ventilation after installation. Stacking stored items directly against low level vents, or allowing debris and planting to build up around the shed’s base, can undermine the ventilation the floor structure was designed to rely on.
- Ignoring bearer size for larger or heavier intended use. Applying a standard small shed bearer size to a larger structure or one planned for heavier storage can result in a floor that flexes more than expected under genuine load.
Case Study: Repairing a Shed Floor Damaged by Trapped Moisture
We were called out to a garden in South East London where a customer’s shed floor had developed noticeable soft, spongy patches after just a few years, despite the concrete base beneath it being in perfectly good condition.
What we found:
| Issue | Detail |
| Base condition | Solid, no problems with the concrete itself |
| Bearer installation | Placed flush against the base, no air gap |
| Result | Moisture trapped beneath bearers, leading to rot |
The concrete base itself was in excellent condition, but the original floor bearers had been installed flush against it, with no gap left for airflow underneath. Over time, moisture became trapped between the bearers and the base surface, gradually rotting the timber from below, well before any obvious signs appeared on the OSB flooring above.
What we did: We removed the affected flooring and bearers, replaced the rotted timber with new pressure treated bearers, and rebuilt the floor structure with a proper air gap maintained beneath them this time, allowing moisture to disperse rather than becoming trapped against the base.
Result: The rebuilt floor structure has remained solid and dry since, with no return of the soft, spongy patches that affected the original installation. This case is a clear example of why the air gap beneath bearers matters just as much as the quality of the base itself.
Maintaining Your Shed Floor Over Time
Once built correctly, a shed floor structure generally needs relatively little ongoing attention, but a few periodic checks help catch any developing issues early. It’s worth occasionally checking for any give, softness, or spongy feeling underfoot, particularly near the shed’s edges or in corners where moisture is more likely to linger if ventilation is ever compromised. Keeping the area immediately around the shed’s exterior clear of built up debris, dense planting, or stacked items also helps maintain the airflow the floor structure relies on, especially around any low level vents built into the shed’s design.
If you ever notice a musty smell, visible dampness, or soft flooring in a specific area, addressing it promptly, rather than waiting for the problem to spread further across the floor structure, generally means a smaller, more manageable repair rather than needing to rebuild a much larger section later.
Frequently Asked Questions
What size timber should I use for shed floor bearers?
47mm x 75mm timber is a standard, reliable size for shed floor bearers and joists, providing adequate strength for typical garden shed floor spans.
How far apart should shed floor joists be spaced?
450mm centres is a standard spacing that provides good support for 18mm flooring sheets without excessive flex or sagging over time.
What flooring material is best for a shed floor?
18mm OSB or plywood sheet flooring is commonly used, providing a solid, stable surface for typical shed use when properly supported by bearers or joists.
Why do shed floors develop rot even when the base is fine?
This is usually caused by bearers being placed directly against the base or ground without a proper air gap, trapping moisture underneath and gradually rotting the timber from below.
Do shed floor bearers need to be pressure-treated?
Yes, using pressure treated timber for bearers adds extra protection against moisture exposure, complementing the air gap that should also be maintained beneath them.
Should I use OSB or plywood for my shed floor?
Both work well for standard sheds. OSB is generally more cost effective, while plywood offers a smoother surface and slightly better moisture handling in certain grades, so the choice often comes down to budget and preference.
Do I need larger bearers for a bigger or heavier-use shed?
Yes, larger sheds or those planned for workshop use with heavier equipment benefit from stepping up to a larger bearer section than the standard 47mm x 75mm used for typical garden storage sheds.
Get a Free Quote for Your Shed Floor Project
Whether you need a new shed floor built properly or an existing one repaired due to moisture damage, JPD Landscaping & Building Services offers free quotes across South East London.